
canva print guide
Setting up my file for print:

1. Get Started
Begin by clicking “Create a design”
and then click “+ Custom size”

2. set the size
Set the FINISHED size of your design (in other words, when we’re finished printing and cutting it, what size do you want it to be?)
- DO NOT tile up your design on a big paper size, in an attempt to help us out. This interferes with our special print software which repeats and tiles the artwork for us.
3. Add bleed and margins
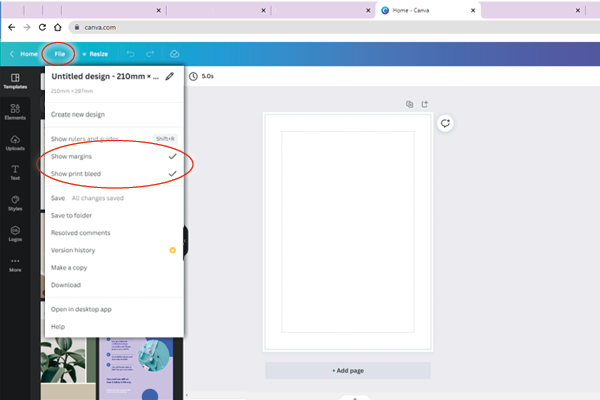
Go to “File” and then “View Settings” and click “Show margins” and “Show print bleed.”
Bleed: Adds extra space around the very outside of your finished file size so that when we cut it, we have a little “wiggle” room. Any background colour/photo MUST be dragged all the way to the edges. There must be NO important details (like text or logos) in this space.
Margins: The margin is the inside dotted line you can see. There must be no important details such as faces in a photo or text outside these lines. This ensures you have a symmetrical and professional-looking file when printed.

4. Send to speedy print
The best thing you can do is send us the Canva link so we can download it with the best settings.
Click “Share”
- Send us the link by changing Collaboration Link from “Only you can access” to “Anyone with the link” and then click the purple “copy link” button. Paste the link in an email to us.
- OR click Download: change the File type to “PDF Print,” tick “Crop marks and bleed” and change the Colour Profile to “CMYK.”
Now send it to info@speedyprint.co.nz and let us work our magic!
For more infomation on bleed, margins, and other important printing tips, click here.
To upload your Canva file and get a quote, click here!

Colours &
Special Finishes

File Prep

Our Services